1. Install GAE - Netbeans Plugin
Download Google App Engine Netbeans Integration plugin from from the below link
https://code.google.com/p/nb-gaelyk-plugin/downloads/list
Extract the contents to a folder.
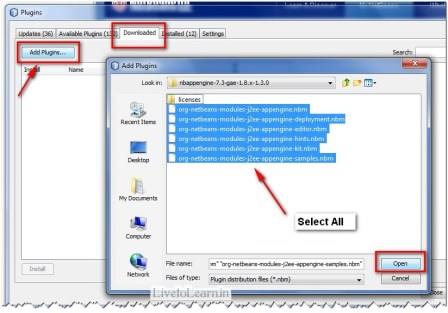
Now open Netbeans IDE and go to Tools -> Plugins
In Downloads Tab, click Add Plugins and browse to the folder which contains the extracted files of the GAE Plugin and import all.
2. Register Google App Engine Server in Netbeans
Go to services tab in Netbeans and Right click on servers, click Add..
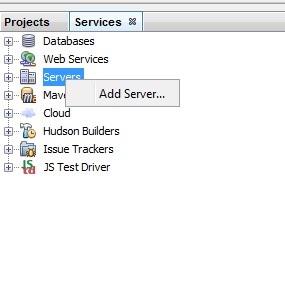

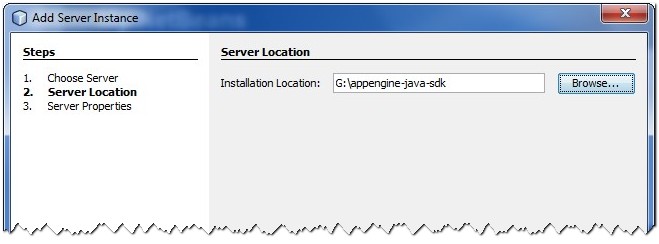
Select Google App Engine and proceed next to choose the GAE SDK folder contents.
In the next window if you wish to change the default ports change it else leave it as is..
HTTP : 8080 Debug : 8765
Then click Finish.
3. Start your first Project
Open File -> New Project, under Samples select Google App Engine
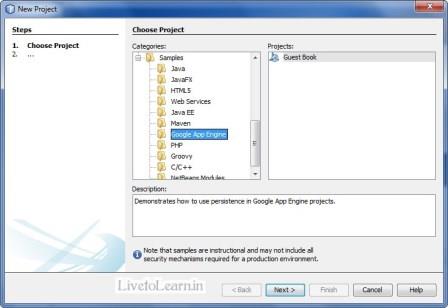
Now edit the sample guestbook application as you want.
Build and Run the project..
4. Deploying to Google Cloud
Sign up for Google App Engine using your Google account.
Create new project and note the project ID.
Update the project ID in appengine-web.xml.
Also, add threadsafe false tag.
Right click on the project name and click deploy.. That's all...
Now access your application at World wide web : http://<-your-app-id->.appspot.com
Comments
In reply to by Aaina Arora
PermalinkI was able to solve this error by changing the appengine-web.xml.
Now I am getting this error
Unable to update:
com.google.appengine.tools.admin.HttpIoException: Error posting to URL: https://appengine.google.co...
403 Forbidden
You do not have permission to modify this app (app_id=u's~driven-copilot-143702').
In reply to by Aaina Arora
PermalinkThanks for updating solution.
In reply to by Piyush
PermalinkTo solve it, you would need to run the cmd. Go to start and run cmd.
Navigate to C:\appengine-java-sdk-1.9.17\bin or whichever your appengine location is then type:
appcfg update "C:/path/to/app/directory/"
I am getting following error
Bad configuration: XML error validating
caused by: cvc-complex-type.2.4.a: Invalid content was found starting with element 'application'.
.Please enter code: Either the access code is invalid or the OAuth token is revoked.Details: invalid_grant
this error is coming after clicking on "Deploy To App Engine" .